Podcast Equipment Upgrades: Professional Sound Microphones & Mixers
Podcast Equipment Upgrades: Invest in These Microphones and Mixers for Professional Sound is crucial for podcasters aiming to elevate their audio quality, offering a clear path to enhanced listener engagement and content credibility through strategic equipment investments.
In the dynamic world of audio content, where listener expectations continue to rise, the quality of your podcast sound is paramount. It’s no longer enough to simply deliver compelling content; your audio must captivate and immerse your audience. This means moving beyond basic setups to truly advanced equipment. Podcast Equipment Upgrades: Invest in These Microphones and Mixers for Professional Sound is not just about acquiring new gear; it’s about strategically enhancing your audio fidelity, ensuring every word resonates with clarity and impact.
The Imperative of Professional Audio in Podcasting
In the expansive and competitive landscape of podcasting, audio quality serves as the foundational pillar for sustained audience engagement. Listeners, now more discerning than ever, often equate sound clarity with content credibility. A podcast plagued by poor audio, be it muffled voices, intrusive background noise, or inconsistent levels, risks alienating its audience, regardless of the brilliance of its subject matter.
Achieving professional-grade audio is not merely an aesthetic choice; it is a strategic investment in your brand and your message. It reflects a commitment to your craft and respect for your listeners’ time and ears. This commitment translates directly into a more immersive experience, fostering deeper connections and encouraging return listenership. Without an earnest focus on audio fidelity, even the most captivating narrative can fall flat, lost amidst technical deficiencies. Therefore, understanding the nuances of sound production and investing in appropriate equipment becomes indispensable for any podcaster aspiring to longevity and influence in this crowded medium.
Understanding the Listener’s Perspective
Listeners prioritize clarity and consistency. They expect an auditory experience that is easy on the ears, allowing them to focus on your message without distraction. This often means:
- Crisp, clear vocals that stand out.
- Minimal to no background noise interference.
- Consistent volume levels throughout the episode.
- A rich, full sound that reflects professionalism.
The Impact of Sound Quality on Growth
Superior audio quality directly influences various aspects of podcast growth. It reduces listener fatigue, increases retention rates, and significantly impacts word-of-mouth recommendations. A high-quality production is more likely to be shared, reviewed positively, and recommended by algorithms that may factor in user engagement and abandonment rates. Investing in your sound is, therefore, investing in the sustainable growth of your podcast and its reach.
Conversely, neglecting audio quality can lead to rapid listener drop-off, negative reviews, and a diminished reputation. Imagine discovering a fascinating podcast, only to be constantly annoyed by its poor sound. Most listeners would abandon it quickly, seeking content that respects their ears. This reinforces that while content is king, sound quality is the vital infrastructure that supports its reign.
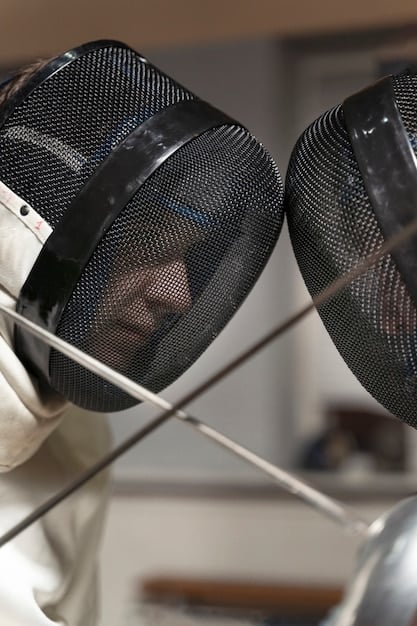
Microphones: Your Voice’s First Impression
The microphone is arguably the single most critical piece of equipment in a podcasting setup. It is the conduit through which your voice, your primary storytelling tool, is translated into an electrical signal. The quality of this initial conversion profoundly impacts the fidelity and character of your sound. A superior microphone captures the nuances of your voice with greater accuracy, richness, and detail, minimizing the need for extensive post-production correction. Choosing the right microphone is not just about picking a popular brand; it’s about understanding the specific acoustics of your recording environment, your voice’s unique characteristics, and the desired sonic signature of your podcast.
There are generally two main types of microphones prevalent in podcasting: dynamic and condenser. Each possesses distinct characteristics that make them suitable for different recording scenarios and vocal styles. Understanding these differences is key to making an informed decision that elevates your podcast’s audio beyond amateur beginnings.
Dynamic Microphones: The Workhorses
Dynamic microphones are renowned for their durability, versatility, and ability to handle high sound pressure levels (SPLs) without distortion, making them excellent choices for less-than-ideal recording environments or for voices that project with significant power. They often exhibit a narrower frequency response and a less detailed sound capture compared to condensers, but this can be advantageous in controlling unwanted room noise. Their inherent ruggedness also makes them suitable for on-the-go recording or live events where equipment might face more wear and tear.
- Shure SM7B: This legendary microphone is a staple in broadcasting and podcasting for its smooth, rich vocal reproduction and exceptional off-axis rejection, which reduces room noise. It requires a significant amount of gain, often necessitating a preamplifier or an in-line activator like the Cloudlifter CL-1 to achieve optimal performance.
- Rode Procaster: Designed specifically for broadcasting, the Procaster offers a rich sound profile, excellent noise rejection due to its tight polar pattern, and an internal pop filter. It provides a warm, radio-ready tone that sits well in a mix.
- Electro-Voice RE20: Another broadcast icon, the RE20 is known for its “Variable-D” technology, which minimizes the proximity effect, allowing you to get close to the mic without excessive bass buildup. It produces a natural, articulate sound well-suited for various vocal types.
Condenser Microphones: Capturing Detail
Condenser microphones, in contrast, are celebrated for their sensitivity, wide frequency response, and ability to capture intricate details in audio. They typically require phantom power (usually 48V) from a mixer or audio interface. Their heightened sensitivity means they are excellent for capturing a full, nuanced vocal performance, but they are also more prone to picking up ambient room noise, making them ideal for acoustically treated spaces.
- Rode NT1-A: Often regarded as one of the quietest studio microphones, the NT1-A delivers a clear, crisp sound with minimal self-noise. It’s an excellent entry point into high-quality condenser microphones for vocal recording, producing professional results without breaking the bank.
- Audio-Technica AT2020: A favorite for home studios, the AT2020 provides a clear, articulate sound at an accessible price point. While it doesn’t offer as much warmth as some higher-end condensers, its transparency makes it a versatile option for various vocal styles and recording needs.
- Neumann TLM 103: A significant leap in investment, the TLM 103 is a large-diaphragm condenser microphone designed to deliver the classic Neumann sound—rich, detailed, and full-bodied. It excels in capturing intricate vocal performances and is a go-to for professional voiceover artists and podcasters who demand uncompromising audio fidelity.
The choice between dynamic and condenser ultimately hinges on your specific needs, budget, and recording environment. For untreated rooms, a dynamic mic often provides more forgiving results. For pristine, acoustically controlled spaces where vocal nuance is paramount, a quality condenser can elevate your sound to professional heights. Regardless of type, a good microphone is the foundation of excellent podcast audio.
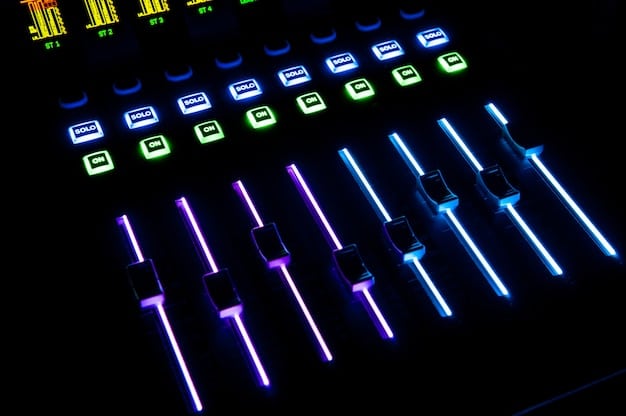
Mixers and Audio Interfaces: The Command Center
While a supreme microphone captures your voice with unparalleled clarity, its full potential remains untapped without a dedicated command center for audio processing and routing. This is where mixers and audio interfaces become indispensable. These devices not only amplify the delicate signal from your microphone but also provide crucial control over volume levels, EQ (equalization), and effects, allowing you to sculpt your sound precisely before it reaches your recording software. They serve as the bridge between your analog microphones and your digital recording environment, translating audio signals into a format that computers can understand and process.
The choice between a standalone mixer and an audio interface depends largely on your specific needs, the complexity of your setup, and whether you require live mixing capabilities or simply a high-quality input for your digital audio workstation (DAW). Both are instrumental in achieving a polished, broadcast-ready sound for your podcast.
Audio Interfaces: Bridging Analog and Digital
Audio interfaces are compact devices designed primarily to convert analog microphone signals into digital data that your computer can record, and vice versa. They typically feature high-quality preamps to boost microphone signals with minimal noise, and they connect to your computer via USB, Thunderbolt, or Firewire. For solo podcasters or those with a co-host, a high-quality audio interface often suffices, providing excellent fidelity and direct control over input levels.
- Focusrite Scarlett 2i2: A perennial favorite for home studios, the Scarlett 2i2 offers two high-quality microphone preamps, low latency, and excellent conversion. It’s incredibly user-friendly and provides a clean, clear signal, making it ideal for solo or two-person podcasting setups.
- Universal Audio Volt 276: Stepping up in quality and features, the Volt 276 combines Universal Audio’s renowned analog circuit emulation (the 76 compressor) with solid preamps and converters. It delivers a noticeably warmer, more ‘produced’ sound directly into your DAW, making it a great choice for those seeking a premium analog feel.
- PreSonus AudioBox USB 96: An affordable and reliable option, the AudioBox USB 96 provides two high-quality combo inputs suitable for microphones or instruments. It’s a robust interface that delivers clear audio and comes bundled with recording software, making it a complete solution for beginners.
Mixers: Control and Versatility
Audio mixers, on the other hand, provide more extensive control over multiple audio inputs, allowing for real-time adjustments, routing, and even on-the-fly sound effects. They are ideal for podcasts involving multiple hosts, guests, or segments requiring music and sound effects to be mixed live. Many modern mixers also include built-in audio interfaces, offering the best of both worlds.
- Rode RodeCaster Pro II: This all-in-one production studio is specifically designed for podcasters. It features four high-quality mic preamps, a fully integrated audio interface, programmable sound pads, and advanced DSP effects. It simplifies complex routing and mixing, allowing podcasters to produce professional-quality broadcasts with ease.
- Zoom PodTrak P4: A portable and highly effective podcast recorder, the P4 offers four XLR mic inputs, individual headphone outputs, and sound pads. It records directly to an SD card, making it perfect for on-location interviews or multi-person setups without needing a computer.
- Behringer Xenyx Q1202USB: For those on a tighter budget but needing multiple inputs, the Q1202USB offers four Xenyx mic preamps, a USB audio interface, and a built-in compressor on each mic channel. It provides solid routing capabilities and decent sound quality for the price.
Ultimately, a well-chosen mixer or audio interface empowers you to take full control of your sound, ensuring that the raw audio captured by your microphone is refined, balanced, and ready for your listeners. This level of control is what truly distinguishes amateur recordings from professional-grade podcast productions.
Acoustic Treatment: The Unsung Hero
Even with the most expensive microphones and sophisticated mixers, your podcast audio can suffer significantly if your recording environment is not properly managed. Acoustic treatment, often an overlooked aspect of equipment upgrades, plays a pivotal role in shaping the final sound quality of your recordings. It’s not about soundproofing—which aims to prevent sound from entering or leaving a space—but rather about sound treatment, which focuses on managing reflections and reverberations within a room. An untreated room can cause echoes, muddiness, and an overall unprofessional sound, making even the best vocal performance sound distant or hollow. Investing in acoustic treatment means creating an environment where your microphone can truly capture your voice, rather than the room noise around it.
The goal of acoustic treatment is to minimize unwanted reflections and create a neutral listening and recording environment. This involves strategically placing materials that absorb, diffuse, or block sound waves to control reverberation and echo. Without proper treatment, your microphone will pick up not just your voice, but also the sound bouncing off walls, ceilings, and furniture, leading to a cluttered and less intelligible recording. This foundational step is as crucial as selecting your primary recording gear.
Strategic Placement of Absorption Panels
Absorption panels are designed to soak up sound waves, reducing unwanted echoes and reverberation. They are most effective when placed at primary reflection points—the spots on your walls, ceiling, and floor where sound from your source (your mouth) first bounces before reaching your microphone. Identifying these points often involves a simple mirror trick: have someone hold a mirror along your walls while you speak; wherever you can see the microphone in the mirror from your speaking position is a prime reflection point. Common materials include fiberglass or rock wool encased in fabric. Proper placement can dramatically tighten your sound, making vocals clearer and more present.
- Foam Panels: While often marketed as acoustic treatment, foam panels are less effective than professional absorption panels at handling a wide range of frequencies. They can offer some improvement for high-frequency harshness but largely fall short of full-spectrum absorption.
- DIY Solutions: Budget-conscious podcasters can create effective absorption panels using materials like Roxul Safe’n’Sound insulation wrapped in breathable fabric. These DIY panels can offer comparable performance to commercial options at a fraction of the cost.
Diffusers and Bass Traps
Beyond absorption, diffusers work by scattering sound waves, preventing flutter echoes and creating a more natural, spacious soundstage without over-dampening the room. They are particularly useful for maintaining some live ambiance while managing reflections. Bass traps, on the other hand, are specifically designed to absorb lower frequencies that tend to build up in corners, causing muddiness or boominess. Addressing these low-frequency issues is crucial for a clean, professional sound, particularly for deeper voices.
- Corner Bass Traps: These are essential for any untreated room, as low frequencies tend to accumulate in corners. Placing bass traps in the corners of your room can significantly reduce excessive bass resonance.
- Ceiling Treatment: Don’t forget the ceiling; it’s a major reflection point. Ceiling clouds or panels can dramatically improve clarity, especially when recording in rooms with hard, reflective ceilings.
Even minor acoustic adjustments, such as using heavy curtains, rugs, or bookshelves filled with books, can contribute to a more controlled recording environment. While a fully treated professional studio might be out of reach for many, understanding and implementing basic acoustic principles can significantly elevate your podcast audio, making every word clearer and more impactful.
Essential Accessories for Enhanced Performance
While microphones and mixers form the core of your podcasting setup, a range of essential accessories can significantly enhance your audio quality and overall recording experience. These often-overlooked components provide crucial support, eliminate unwanted noises, and improve workflow, solidifying your path toward professional-sounding productions. Ignoring these smaller, yet vital, pieces of equipment can undermine the investment made in high-quality primary gear, leading to frustrating recording sessions and suboptimal audio outputs.
Each accessory plays a specific role in refining your sound, from preventing plosives to isolating your microphone from vibrations. Integrating these thoughtful additions into your setup demonstrates a complete understanding of audio production, ensuring that your voice is captured with the utmost clarity and without distracting elements. They are the unsung heroes that contribute to a polished and professional final product.
Pop Filters and Wind Screens: Taming Plosives and Sibilance
Pop filters and windscreens are indispensable for spoken word recordings. A pop filter, placed a few inches in front of the microphone, is designed to diffuse the sudden bursts of air that accompany plosive sounds (like ‘p’ and ‘b’). Without it, these sounds can create harsh, distracting thumps in your recording. Windscreens, typically made of foam, fit directly over the microphone capsule to reduce wind noise or breath sounds, particularly useful for dynamic microphones or outdoor recording. Both accessories contribute to a smoother vocal performance, free from acoustic anomalies.
- Metal Mesh Pop Filters: These offer excellent plosive reduction and are durable. They are also easier to clean than fabric filters.
- Fabric Pop Filters: More common and affordable, fabric pop filters are effective but can be prone to collecting dust over time.
Shock Mounts: Isolating Your Microphone
A shock mount is a cradle that suspends your microphone using elastic bands or rubber, isolating it from vibrations transmitted through the microphone stand or desk. Taps on the table, footsteps, or even subtle bumps can travel up the stand and be picked up by a sensitive microphone, creating unwanted rumble or thumping sounds. A high-quality shock mount effectively absorbs these vibrations, ensuring that only your voice is captured. This accessory is particularly crucial for condenser microphones, which are highly sensitive to handling noise.
- Universal Shock Mounts: Many shock mounts are designed to accommodate a range of microphone sizes, offering versatility if you plan to use different microphones.
- Dedicated Shock Mounts: Some high-end microphones come with custom-designed shock mounts that are precisely engineered for their specific weight and form factor, offering superior vibration isolation.
Headphones and Cables: Monitoring and Connectivity
Closed-back headphones are essential for monitoring your audio during recording. They prevent your microphone from picking up your headphone audio (feedback) and allow you to hear exactly what your microphone is capturing, enabling you to identify and correct issues in real-time. Good quality, oxygen-free copper (OFC) cables are also crucial. While seemingly minor, low-quality or damaged cables can introduce noise, signal loss, or intermittent connections, compromising your audio fidelity. Invest in reliable XLR cables for connecting your microphones to your mixer or interface, and ensure they are an appropriate length to avoid unnecessary clutter or tension.
- Studio Monitor Headphones: These headphones are designed for accurate sound reproduction, providing a flat frequency response that allows you to hear your audio as it truly is, without artificial boosts or cuts.
- Cable Management: Employing cable ties or Velcro straps can keep your setup tidy, prevent accidental disconnections, and extend the life of your cables.
By thoughtfully integrating these essential accessories, you build a robust and highly functional podcasting setup. Each piece, no matter how small, contributes significantly to mitigating potential audio issues, allowing you to focus on delivering compelling content with pristine sound.
Future-Proofing Your Podcasting Setup
In the rapidly evolving landscape of audio production, anticipating future needs and making strategic investments in your podcasting equipment can save you time, money, and frustration down the line. Future-proofing isn’t about buying the most expensive gear available; it’s about selecting components that offer flexibility, scalability, and compatibility with emerging technologies. This approach ensures your setup can adapt to new demands, whether it’s expanding your team, incorporating new recording techniques, or simply maintaining a competitive edge in audio quality.
Thinking ahead also involves considering the longevity and reputation of manufacturers, the availability of software updates, and the potential for integrating new tools into your workflow. A well-planned upgrade path allows for incremental improvements rather than costly overhauls, ensuring your podcast remains at the forefront of audio excellence for years to come.
Scalability and Modularity
When selecting microphones and mixers, consider their scalability. Will your audio interface accommodate additional microphones if you decide to add more co-hosts or guests? Does your mixer offer enough channels and inputs for future expansion, such as external audio sources or additional effects? Modular systems, where components can be added or swapped out as needed, provide greater flexibility. For example, choosing an audio interface with ADAT inputs allows you to add more microphone preamps in the future without replacing the entire unit.
- Multi-channel Interfaces: If you foresee expanding beyond a two-person setup, opting for an interface with four or more inputs from the start can prevent an immediate need for an upgrade.
- Digital Mixers: While more complex, digital mixers often offer immense routing flexibility and recallable settings, making them highly adaptable to changing production needs.
Software Integration and Compatibility
The synergy between your hardware and software is critical. Ensure that your chosen audio interface or mixer is fully compatible with your preferred Digital Audio Workstation (DAW) and operating system. Look for devices that receive regular driver and firmware updates, ensuring long-term performance and security. Some devices offer proprietary software for advanced control, while others seamlessly integrate with popular third-party plugins and effects. Good software integration streamlines your workflow and expands your creative possibilities.
- ASIO Drivers: For Windows users, look for interfaces with robust ASIO drivers, which provide low-latency performance essential for real-time monitoring and recording.
- Bundled Software: Many interfaces come with free versions of DAWs or plugin bundles, which can be a valuable starting point for new podcasters.
Durability and Manufacturer Support
Investing in higher-quality equipment often translates to better build quality and longevity. Research manufacturers known for their reliability and customer support. A company with a strong track record of producing durable goods and offering excellent post-purchase support instills confidence. Check warranty periods and the availability of spare parts or repair services. A well-constructed piece of equipment, even if slightly more expensive upfront, can prevent costly replacements or repairs in the long run, ensuring your podcast can continue to produce high-quality content without unexpected interruptions.
By adopting a future-oriented mindset when upgrading your podcast equipment, you not only improve your current audio quality but also build a resilient and adaptable production setup. This strategic planning supports the continuous growth and evolution of your podcast, allowing you to focus on what truly matters: delivering captivating content to your audience.
Advanced Techniques & Software: Refining Your Sound
Beyond hardware upgrades, the pursuit of professional podcast audio extends into the realm of advanced production techniques and sophisticated software tools. Even with top-tier microphones and mixers, the raw audio often requires further refinement to achieve broadcast-ready quality. This involves understanding and applying principles of audio post-production, leveraging Digital Audio Workstations (DAWs), and utilizing specialized plugins that can sculpt, clean, and enhance your sound. The careful application of these techniques can transform good recordings into truly exceptional ones, ensuring consistency and polish across all your episodes.
Mastering these advanced methods allows for precise control over every aspect of your audio, from noise reduction to dynamic range compression. It’s the final, crucial step in separating amateur productions from those that resonate with professional clarity and impact, providing an immersive listening experience that keeps audiences engaged and coming back for more.
Digital Audio Workstations (DAWs): Your Editing Suite
A Digital Audio Workstation (DAW) is the central software platform where you record, edit, mix, and master your podcast episodes. While some basic recording tasks can be handled by simpler applications, a full-featured DAW offers unparalleled control and flexibility. Leading DAWs provide multitrack recording capabilities, extensive editing tools (cutting, splicing, noise reduction), and the ability to apply a wide array of effects and plugins. Investing time in learning a robust DAW is as important as investing in hardware.
- Adobe Audition: A powerful and comprehensive DAW specifically tailored for audio production, Audition offers advanced noise reduction, spectral editing, and multitrack mixing capabilities. It’s part of the Adobe Creative Cloud suite, making it a popular choice for those already in the ecosystem.
- Reaper: Known for its affordability and customizability, Reaper is a highly capable DAW that offers professional-grade features without the hefty price tag. It has a steep learning curve but is incredibly powerful once mastered, making it a favorite among experienced audio engineers.
- Audacity: While not a full-fledged DAW, Audacity is a free, open-source audio editor that is excellent for basic recording and editing tasks. It’s a great starting point for beginners before committing to a paid solution.
EQ, Compression, and Noise Reduction: Sculpting Your Sound
These three processing techniques are fundamental to achieving professional podcast audio. Equalization (EQ) allows you to adjust the balance of different frequencies in your audio, addressing muddiness, harshness, or thinness to make voices sound clearer and more present. Compression helps to manage the dynamic range of your audio, making louder parts softer and quieter parts louder, resulting in a more consistent and “up-front” vocal delivery. Noise reduction tools identify and remove unwanted background sounds (like hums, static, or air conditioning), cleaning up your recordings without degrading the primary audio.
- Parametric EQ: Offers precise control over specific frequency bands, allowing you to boost or cut specific frequencies to shape the tonal quality of a voice.
- Multiband Compressor: Allows for compression to be applied to different frequency ranges independently, providing finer control over dynamics than a standard compressor.
- AI-Powered Noise Reduction: Newer software solutions leverage artificial intelligence to more intelligently distinguish between desired audio and noise, offering superior noise reduction results compared to older algorithms.
Beyond these, other techniques like de-essing (to reduce harsh “s” sounds), limiting (to prevent peaks from clipping), and reverb/delay (used sparingly to add character or space) can further enhance your podcast’s sonic appeal. The key is to use these tools judiciously, allowing them to subtly improve your audio without making it sound overly processed or artificial. Continuous learning and experimentation with these advanced techniques are vital for refining your podcast’s signature sound and maintaining a high level of audio professionalism.
| Key Point | Brief Description |
|---|---|
| 🎤 Microphone Choice | Dynamic mics for untreated rooms; Condensers for detailed capture in acoustic spaces. |
| 🎚️ Mixer/Interface Role | Amplify mic signals, provide level control, and convert analog to digital audio. |
| 🏠 Acoustic Treatment | Manages reflections and reverberation for a cleaner, more professional sound. |
| ⚙️ Essential Accessories | Pop filters, shock mounts, and quality headphones prevent noise and improve monitoring. |
Frequently Asked Questions About Podcast Audio Upgrades
▼
For most beginner podcasters, upgrading your microphone yields the most significant and immediate improvement in audio quality. Even an affordable upgrade from a built-in laptop mic or simple USB mic to a dedicated dynamic or entry-level condenser microphone can transform your sound, making your voice clearer and more professional. It’s the primary component listeners notice first.
▼
For solo podcasters or those with one co-host, a quality audio interface is usually sufficient. It efficiently connects your mic to your computer. A mixer becomes essential when you have multiple participants, need live audio control, or want to integrate sound effects and music on the fly. It depends on the complexity of your setup and recording workflow.
▼
Acoustic treatment is critically important and often undervalued. Even the best equipment cannot fully compensate for poor room acoustics. An untreated room can introduce echoes and reverberation, making your audio sound unprofessional. Treating your recording space minimizes unwanted noise and reflections, allowing your quality microphones to capture your voice purely, significantly enhancing clarity.
▼
Dynamic microphones are durable, handle high sound levels well, and are less sensitive to background noise, making them ideal for untreated rooms. Condenser microphones are more sensitive, capture greater detail and frequency range, but also pick up more room ambiance, best suited for acoustically treated spaces. The choice depends on your environment and desired sound.
▼
While AI tools like Adobe Podcast’s Enhance Speech or Descript’s Studio Sound can significantly improve imperfect audio, they work best on recordings that are already relatively clean. They are powerful post-production aids but cannot fully replace the foundational quality provided by good microphones and a properly treated environment. Think of them as enhancers, not magic fixers.
Conclusion
Investing in your podcast’s audio production is not merely an expenditure; it is a strategic commitment to your craft and your audience. By thoughtfully considering Podcast Equipment Upgrades: Invest in These Microphones and Mixers for Professional Sound, you’re not just buying gear—you’re acquiring the tools necessary to clearly transmit your message, captivate your listeners, and establish a credible, professional presence in the competitive audio landscape. The journey from nascent podcaster to established voice is paved with continuous learning, refined techniques, and a steadfast dedication to delivering the highest quality sound possible. Each upgrade, from the nuanced selection of a microphone to the careful calibration of a mixer, contributes to an immersive auditory experience, ensuring your podcast resonates with clarity, impact, and a professional sheen that truly sets it apart.


