Podcast Equipment Guide: Best Audio Under $500
A comprehensive **Podcast Equipment Guide: Top Microphones and Software for Professional-Quality Audio on a $500 Budget**, offering a curated selection of microphones and software to achieve professional-sounding podcasts without breaking the bank.
Ready to launch your podcast but worried about the cost? This Podcast Equipment Guide: Top Microphones and Software for Professional-Quality Audio on a $500 Budget will show you how to get professional results without emptying your wallet.
Creating a Professional Podcast Studio on a Budget
Starting a podcast can feel daunting, especially when considering the equipment. Many aspiring podcasters believe that achieving high-quality audio requires expensive gear. However, it’s entirely possible to create a professional-sounding podcast studio without exceeding a reasonable budget. This guide focuses on selecting the best microphones and software, proving that excellent audio is attainable even on a $500 budget.
This guide demystifies the process, offering practical advice and specific recommendations. We’ll cover essential equipment, software options, and tips for optimizing your recording environment. By the end, you’ll have a clear roadmap for creating a podcast that sounds polished and professional.
Choosing the Right Microphone for Your Podcast
The microphone is arguably the most critical piece of equipment for any podcast. It directly impacts the audio quality of your recordings. When selecting a microphone within a $500 budget, it’s essential to consider factors like microphone type, polar pattern, and connectivity.
Different microphones offer varying sound characteristics. Some are better suited for vocals, while others excel at capturing ambient sounds. Understanding these nuances will help you choose the microphone that best fits your podcast’s needs. Let’s explore some recommended microphones that offer excellent performance without breaking the bank.
USB Microphones: Convenience and Quality
USB microphones are a popular choice for podcasters due to their ease of use and affordability. These microphones connect directly to your computer via USB, eliminating the need for an audio interface. Many USB microphones offer excellent sound quality, making them a great option for beginners.
- Blue Yeti: The Blue Yeti is a versatile USB microphone known for its multiple polar patterns (cardioid, stereo, omnidirectional, and bidirectional). This allows you to use it in various recording scenarios, from solo podcasts to interviews.
- Audio-Technica AT2020USB+: The AT2020USB+ is a solid condenser microphone that delivers clear and detailed audio. It’s a great option for podcasters who prioritize vocal clarity.
- Rode NT-USB Mini: The Rode NT-USB Mini is a compact and easy-to-use USB microphone that delivers professional-quality sound. Its built-in pop filter and zero-latency headphone monitoring make it a great choice for beginners.
Consider which USB microphone suits your needs. If you conduct interviews, the Blue Yeti is a great overall pick for its different pattern selections. If clarity is your main concern, opt for the Audio-Technica AT2020USB+.
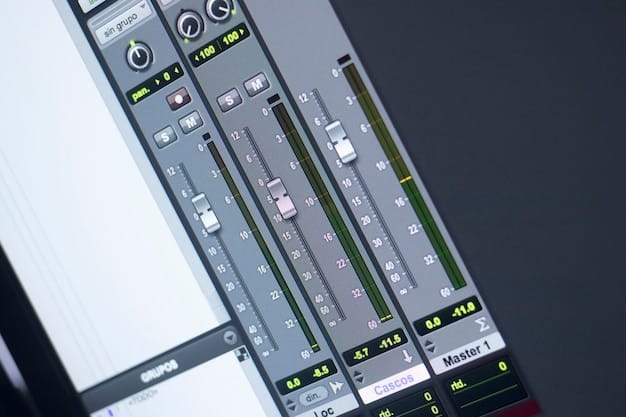
Essential Software for Podcast Recording and Editing
While a good microphone is essential, podcasting software is equally vital. It allows you to record, edit, and enhance your audio. Fortunately, there are many free and affordable software options available that provide all the necessary tools for creating a professional-sounding podcast.
The right software can streamline your workflow and improve the overall quality of your podcast. Whether you need to remove background noise, add music, or assemble multiple audio tracks, the software will allow you to achieve your podcasting goals.
Free and Affordable Podcast Software Options
Many aspiring podcasters are concerned about the cost of podcasting software, but high-quality audio editing is not as expensive as you might think. Thankfully there are plenty of options for the amateur podcaster looking to keep expenses down.
- Audacity: Audacity is a free, open-source audio editor that offers a wide range of features for recording and editing podcasts. It supports multitrack recording, noise reduction, and various audio effects.
- GarageBand: GarageBand is a free digital audio workstation (DAW) available for macOS and iOS users. It provides a user-friendly interface and a comprehensive set of tools for recording, editing, and mixing audio.
- Reaper: REAPER is a digital audio workstation that offers a 60-day free trial period before needing a license. Its powerful features and affordable price point makes it a more affordable option for recording, editing, processing, mixing, and mastering audio and MIDI.
Consider what features are most important to you when choosing software. GarageBand is an excellent choice for Apple users, while Audacity is an across the board option. If you’re ready to move on to more heavy editing, REAPER is a reliable DAW with a one-time fee.
Creating an Optimized Recording Environment
Even with the best microphone and software, the quality of your recording environment can significantly impact the final audio. Background noise, echoes, and reflections can detract from the clarity and professionalism of your podcast. Creating an optimized recording environment is an essential step in producing high-quality audio.
Fortunately, you don’t need to invest in expensive soundproofing materials to create a decent recording space. There are several simple and cost-effective techniques you can use to improve the acoustics of your room.
Simple Steps to Improve Your Recording Environment
No soundproofing is going to be as effective as professional equipment, but there are steps you can take to make your listening environment better. If you take the extra initiative, you can create a recording that sounds top-tier even with budget equipment.
- Choose a Quiet Room: Select a room in your home that is relatively quiet and free from distractions. Avoid rooms near busy streets or noisy appliances.
- Reduce Reflections: Soft surfaces like carpets, curtains, and blankets can help absorb sound and reduce reflections. Place these materials around your recording area to minimize echoes.
- Use Acoustic Panels: Acoustic panels are designed to absorb sound waves and reduce reverberation. You can purchase affordable acoustic panels online or even make your own using materials like fiberglass or mineral wool.
Consider the space you’ll be recording in and what issues you may run into. If you’re in a smaller room, focus more on softening the sound to reduce harsh echoes.
Accessories to Enhance Your Podcast Setup
While the microphone and software are the core components of your podcasting setup, certain accessories can further enhance your recording experience and improve the quality of your audio. These accessories can range from microphone stands and pop filters to headphones and cables.
These tools are affordable and can significantly contribute to the clarity and professionalism of your podcast. These additional tools can range from microphone stands and pop filters to headphones and cables.
Recommended Accessories for Podcasters
Most of the tools mentioned are not completely necessary, but are more convenient for amateur podcasters. The more seriously you take your craft, the more they’ll improve your output.
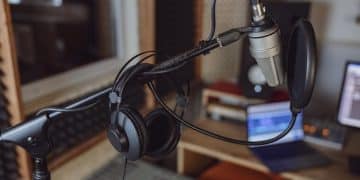
- Microphone Stand: A microphone stand is essential for positioning your microphone correctly and preventing unwanted noise from handling.
- Pop Filter: A pop filter is a screen that sits in front of your microphone and reduces popping sounds caused by plosive consonants (like “p” and “b”).
- Headphones: Headphones are crucial for monitoring your audio while recording. They allow you to hear your own voice clearly and identify any potential problems with your recording.
While they won’t improve the quality of your audio directly, things like microphone stands are vital if you’re going to do longer recordings.
Tips for Achieving Professional-Quality Audio
Investing in the right equipment and software is only part of the equation. To achieve professional-quality audio, you must also develop good recording habits and editing techniques. These habits can significantly improve the overall sound of your podcast.
By following these tips, you can ensure that your podcast sounds polished, clear, and engaging for your listeners.
Essential Recording Techniques for Podcasters
There are plenty of techniques to consider when starting a podcast. Like anything, it begins to come more naturally to you as you refine your craft.
- Speak Clearly and Consistently: Enunciate your words and maintain a consistent speaking volume throughout your recording. Avoid mumbling or shouting into the microphone.
- Reduce Background Noise: Minimize background noise by turning off appliances, closing windows, and silencing notifications on your devices.
- Test Your Audio Levels: Before you start recording, test your audio levels to ensure that your voice is loud enough but not clipping (distorting).
Once you develop these habits and consider the way the sound will be processed when editing, you can vastly improve the quality of your podcast, even with budget equipment.
Conclusion
Creating a professional-sounding podcast doesn’t have to break the bank. With a budget of $500, you can acquire the essential equipment and software needed to produce high-quality audio. By carefully selecting a microphone, choosing the right software, optimizing your recording environment, and developing good recording habits, you can create a podcast that sounds polished and engaging for your listeners.
| Key Point | Brief Description |
|---|---|
| 🎤 Microphone Selection | Choose a USB microphone like Blue Yeti or Rode NT-USB Mini for easy setup and good quality. |
| 💻 Software Options | Use free software like Audacity or GarageBand for recording and editing your podcast. |
| 🎧 Accessories | Consider a microphone stand, pop filter, and headphones to enhance your podcast setup. |
| 🏠 Recording Environment | Optimize your recording environment by choosing a quiet room and reducing reflections. |
Frequently Asked Questions
▼
USB microphones are generally the best choice. They offer a good balance of quality and convenience, plugging directly into your computer without needing additional equipment like an audio interface. Consider the Blue Yeti or Rode NT-USB Mini.
▼
Audacity is a popular, open-source audio editor that’s free. GarageBand is great if you’re a Mac user. REAPER is another option that gives a free trial, but has a license cost after. All of these are great choices depending on how you plan to edit.
▼
Choose a quiet room, reduce reflections by adding soft materials like blankets or curtains, and consider using affordable acoustic panels to absorb sound and minimize echoes. You don’t need complete soundproofing to create stellar audio.
▼
While not strictly essential, they can significantly improve the quality of your recordings. A pop filter helps reduce popping sounds, and a microphone stand allows for proper mic positioning and reduces handling noise. Consider whether these accessories would better your recordings.
▼
Speak clearly and consistently, minimize background noise, and always test your audio levels before starting to record. Be aware of how the audio will be processed in post, and that should dictate the nuances of your recording.
Conclusion
By implementing the strategies and recommendations outlined in this guide, you can create a professional-sounding podcast without exceeding your $500 budget. Remember, the key is to prioritize quality within your means and leverage free or affordable resources to achieve your podcasting goals. With a bit of planning and effort, you’ll be on your way to creating compelling audio content that engages your audience!


